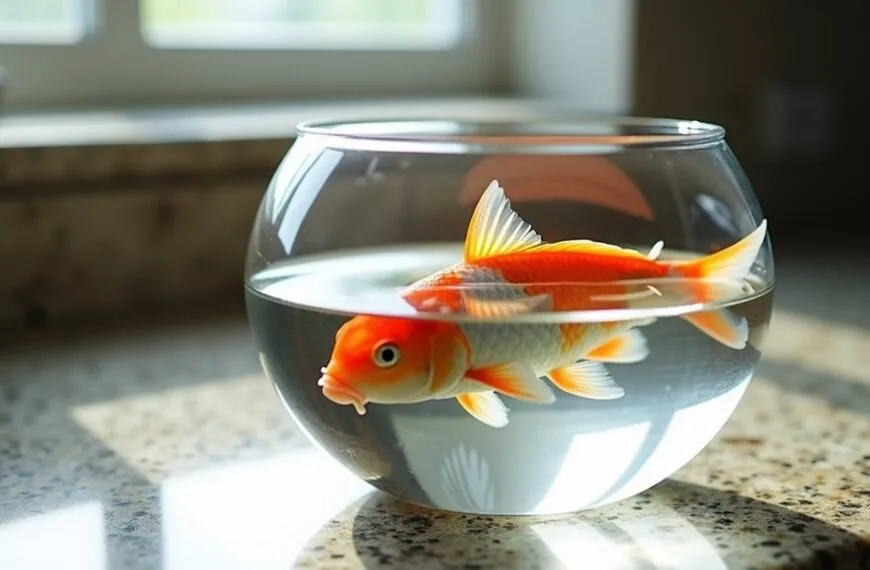
To change your fish tank's water safely, start by gathering essential tools like a bucket, siphon, and water conditioner. You'll want to change about 10-15% of the water weekly, ensuring the new water matches your tank's temperature within 1-2°F. Always treat tap water with a dechlorinator and let it sit for stability. When removing old water, use gentle siphoning techniques and add the fresh water slowly to avoid shocking your fish. Don't forget to unplug electrical equipment before starting and monitor your fish's behavior throughout the process. There's much more to mastering the perfect water change for your aquatic friends.
Contents
- 1 Understanding Water Change Basics
- 2 Essential Equipment and Tools
- 3 Pre-Change Water Preparation
- 4 Safe Water Removal Process
- 5 Adding Fresh Water Correctly
- 6 Post-Change Tank Monitoring
- 7 Common Water Change Mistakes
- 8 Frequently Asked Questions
- 8.1 Can I Use Bottled Spring Water for My Aquarium Water Changes?
- 8.2 How Long Should I Wait Between Water Changes if Fish Are Breeding?
- 8.3 Should I Feed My Fish Before or After a Water Change?
- 8.4 What if My Tap Water Naturally Has Different Ph Than Tank Water?
- 8.5 Can Water Changes Help Treat White Spot Disease in Fish?
- 9 Final Thoughts
Understanding Water Change Basics
Maintaining a healthy aquarium begins with understanding the fundamentals of water changes. You'll need to become familiar with your tank's specific needs, as every aquarium has its own unique requirements based on the number of fish and how much you're feeding them. Your primary goal is to keep nitrate levels below 40 ppm for ideal fish health. Think of it like keeping your fish's home clean – nobody wants to swim in dirty water! Large variations in water parameters during changes are actually not harmful to fish, contrary to common beliefs. You'll want to monitor these levels regularly, just as you'd check the air quality in your own home. When you notice the nitrates climbing, that's your cue to schedule a water change. Live plants can help reduce the frequency of water changes by naturally absorbing nitrates.
Most aquariums need water changes every week to six weeks, depending on how many fish you're housing. If you've got a tank that's packed with fish (we know how tempting it's to add "just one more"!), you'll need more frequent changes. Moreover, maintaining a proper bio-load is crucial for optimal water quality and fish health.
The key is to perform partial changes of 25-30% rather than complete water swaps, which can stress your aquatic friends. Remember, you're not giving your tank a complete makeover – you're just revitalizing their environment to keep it comfortable and healthy.
Essential Equipment and Tools
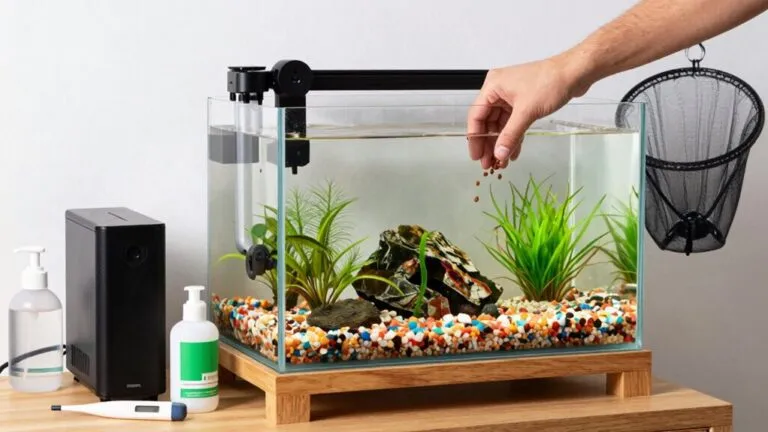
Before diving into your water change routine, you'll need to gather the right equipment to make the process smooth and efficient. The essentials include a large bucket with volume markings, which you'll use to collect old tank water and measure new water accurately. Since you'll only need to change 25% of water every 4-5 weeks, these tools will serve you well long-term. Maintaining clean, balanced water is crucial for your aquarium's health.
Don't forget a reliable siphon or gravel vacuum – they come in various sizes, so you'll want to choose one that matches your tank's capacity. A proper cleaning session with these tools typically takes 10-15 minutes for optimal results.
Water conditioners are your fish's best friends, as they'll neutralize harmful chlorine and chloramines in tap water. You'll also need a water test kit to monitor water parameters before and after the change – think of it as your aquarium's health check-up tool! Regular testing of water parameters helps identify any issues that could affect fish health.
For easier maintenance, especially if you're tired of lugging heavy buckets around, consider investing in a Python Water Changer or Marina Aqua Vac that connects directly to your sink.
Keep a towel handy for inevitable splashes, and don't forget basic tools like a net for catching debris and UNS scissors for trimming plants.
These tools aren't just convenient – they're essential for keeping both you and your finned friends happy during water changes.
Pre-Change Water Preparation
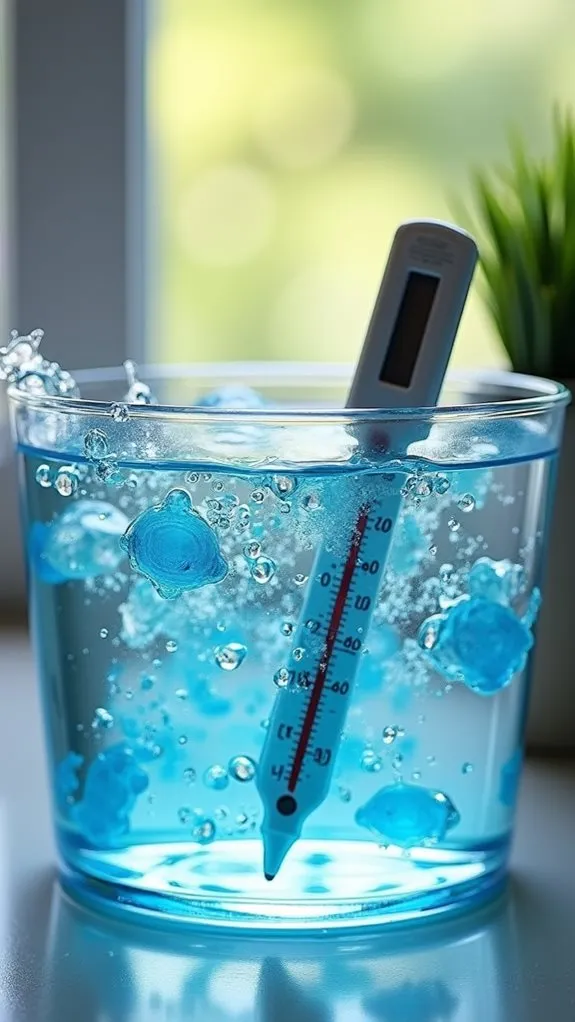
Proper water preparation stands as the cornerstone of a successful tank cleaning. Before you plunge into the water change, you'll need to verify your source water matches your tank's existing conditions to keep your finned friends happy and stress-free.
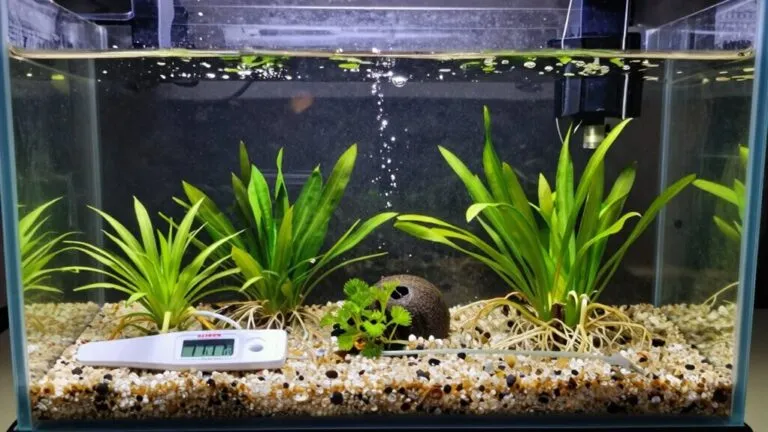
Testing tap water parameters before use will help you identify potential issues with pH, ammonia, nitrite, nitrate, and GH/KH levels. Start by checking the water parameters of both your tank and the new water you'll be using. You don't want to shock your fish with dramatic changes, so use a reliable thermometer to confirm the temperatures match. Remember, even a 5-degree difference can send your fish into a stress spiral, potentially leading to problems like Whitespot disease – and nobody wants that! Beneficial bacteria supplements can help maintain the biological balance during water changes. Additionally, ensuring that your tank conditions remain stable can prevent toxic buildup that can stress out your fish.
Don't forget to treat your new water with a quality dechlorinator that handles both chlorine and chloramine. If your tap water's quality is questionable (we've all been there), you might want to take into account using reverse osmosis water instead.
Let your prepared water sit for up to 24 hours to make sure everything's stable and ready to go. Think of it like making the perfect cup of tea – you wouldn't use scalding water for delicate green tea leaves, would you? Your fish deserve the same thoughtful preparation!
Safe Water Removal Process
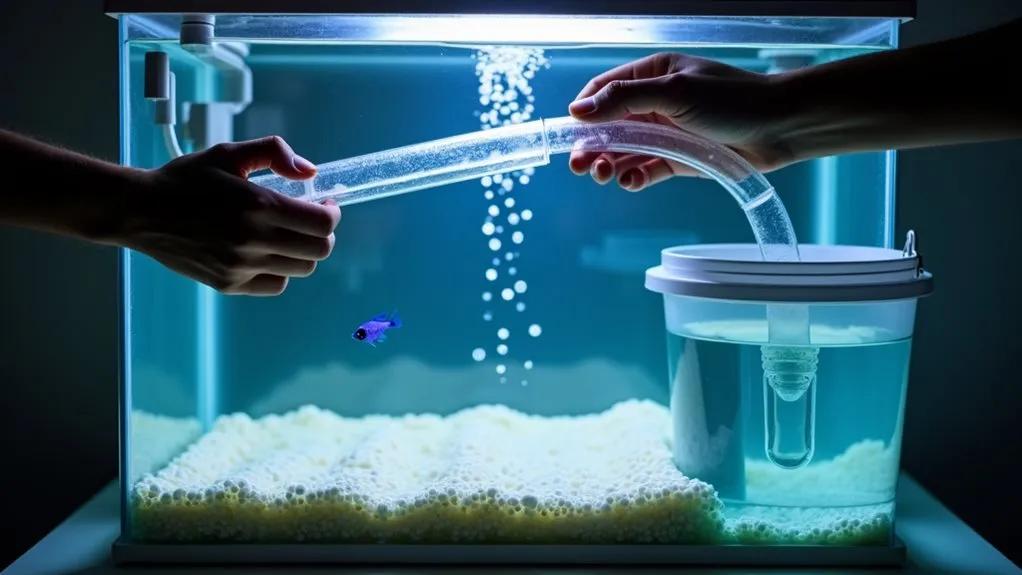
Immerse yourself in the water removal process by first unplugging all electrical equipment – including heaters, filters, and lights – to confirm your safety.
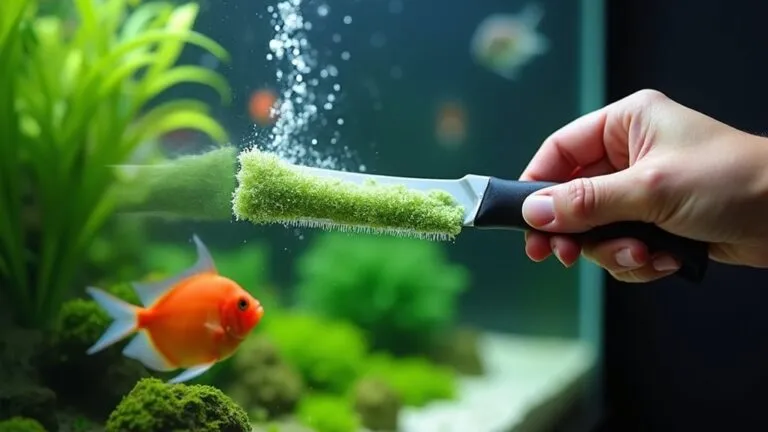
You'll want to use safe siphoning techniques to remove water while maintaining beneficial bacteria in your tank. Think of it as giving your aquatic friends a revitalizing spa day without disturbing their healthy environment! Experts recommend 10 to 15 percent weekly water changes for optimal fish health, as this helps keep ammonia levels low in the tank.
A Marina Aqua Vac can make the water removal process significantly easier, especially for tanks over 25 gallons.
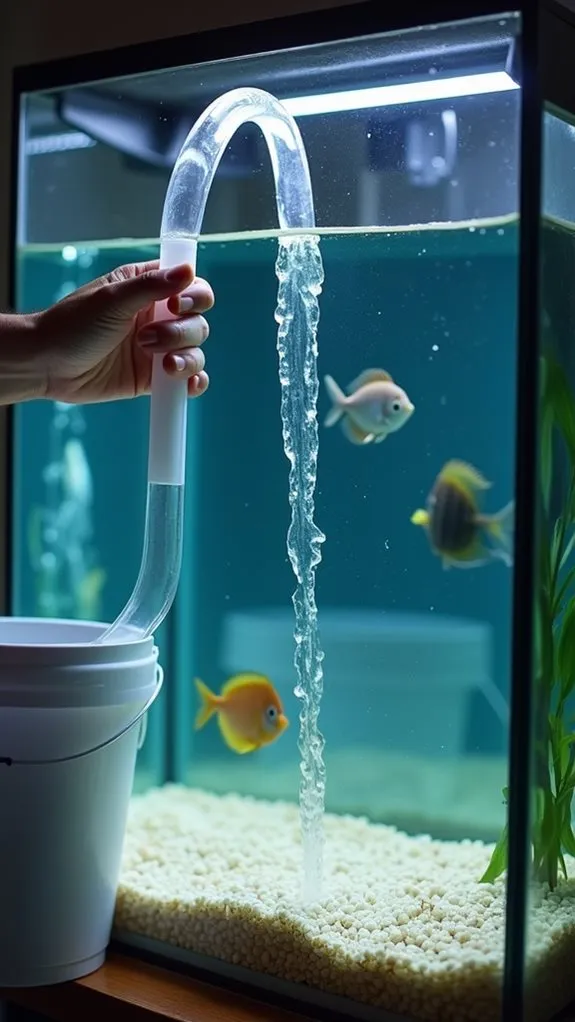
Here's your step-by-step guide to proper water removal:
- Start your gravel siphon gently, using a ball valve to avoid direct contact with tank water – no one wants an accidental gulp of fish water!
- Target those pesky areas where debris and leftover food have settled, moving slowly to avoid startling your finned companions.
- Remove between 1/3 to 1/2 of the water, though you can go up to 75% for really dirty tanks (but let's try to avoid letting it get that bad!)
- Keep an eye on your water level – don't remove more than you can replace.
Remember to work slowly and steadily as you siphon. You're not just cleaning – you're preserving the delicate balance of beneficial bacteria that keeps your underwater ecosystem thriving.
Take your time and watch your fish's behavior to confirm they're comfortable throughout the process.
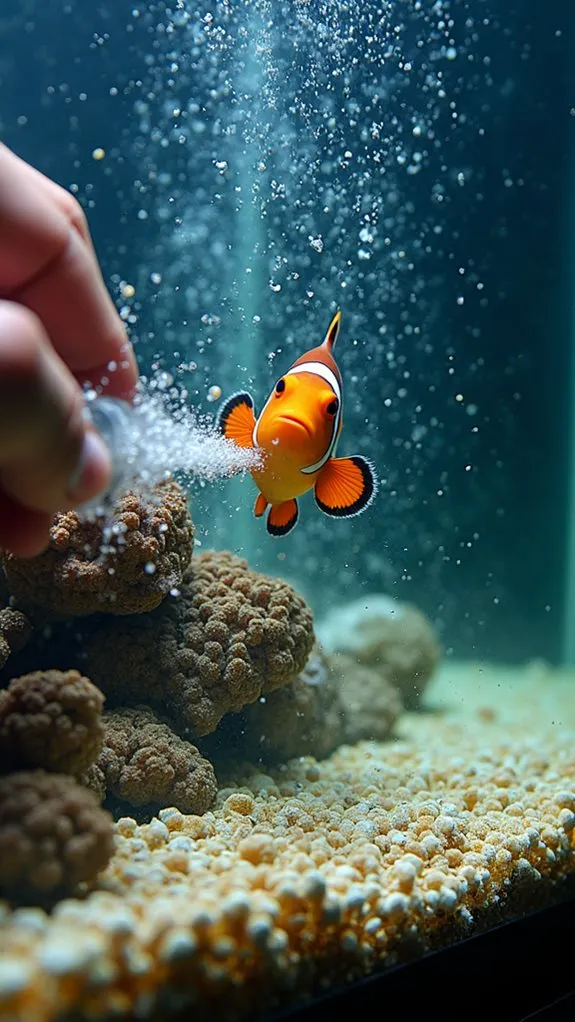
Adding Fresh Water Correctly

You'll need to match the temperature of your tank's water to your tank's water, as your fish won't appreciate an unexpected cold shower. A stable environment is crucial for maintaining fish health during water changes. For optimal water quality, consider testing your water parameters after the change to ensure essential test parameters remain within safe ranges.
Place the new water over a plate on the bottom while refilling to prevent disturbing your aquarium setup. Pour the dechlorinated water slowly over a clean plate into your aquarium, which helps prevent the gravel from getting kicked up and your fish from getting stressed. Don't forget to add your water conditioner to treat chlorine and chloramine before the water goes in – it's a small step that'll keep your finned friends happy and healthy.
Temperature Matching Is Vital
Temperature matching stands as one of the most vital steps when adding fresh water to your aquarium. When you're doing water changes, even small temperature differences can cause fish stress and potentially lead to serious health issues. Your tropical fish are quite particular about their comfort zone, preferring a cozy 77°F, and they won't appreciate any sudden changes!
Here's what you'll need to do to guarantee proper temperature matching:
- Use a floating thermometer to check both your new water and aquarium water temperatures.
- Mix hot and cold tap water until you reach the desired temperature.
- Keep the temperature difference within 1-2 degrees Fahrenheit.
- Monitor temperatures throughout the entire water change process.
You'll find that smaller water changes of 10-15% won't impact your tank's temperature dramatically. However, if you're doing larger changes, you'll want to be extra careful. Increased metabolism due to temperature changes can heighten fish stress and reduce their overall health.
Think of it this way – your fish are like us when we jump into a pool that's too cold! Their decorations, gravel, and plants help stabilize the temperature, but it's still essential to match temperatures properly to prevent any unnecessary stress on your aquatic friends.
Slow Pour Prevents Stress
A fish tank's delicate ecosystem depends heavily on how you add fresh water during changes. When you're performing water changes, your acclimation techniques can make all the difference between happy, healthy fish and stressed ones that are more prone to illness.
You'll want to focus on gentle, controlled water addition using filter foam squares as your best friend. Place these foam squares over your substrate – think of them as tiny shock absorbers for your tank! Start with fine-membraned foam on the bottom, then layer larger-membraned pieces on top. This creates a perfect buffer zone that'll protect your tank's water chemistry and keep your finned friends swimming contentedly.
Don't forget that slow and steady wins the race here. Whether you're using a siphon, pump, or good old-fashioned bucket method, make sure you're adding dechlorinated water at a gentle pace. This approach helps maintain your tank's biological balance and keeps beneficial bacteria thriving in your filter and gravel.
Additionally, maintaining optimal water parameters such as chemical levels is crucial for fish health. Your fish will thank you by staying active and stress-free, and you'll avoid that dreaded cloudy water that can happen when substrate gets stirred up too quickly.
Proper Dechlorination Methods
Fresh water needs proper dechlorination before it enters your aquarium, building on the careful pouring techniques we've discussed.
Your fish's safety depends on removing harmful chlorine and chloramine, and you've got several reliable dechlorination techniques at your disposal. Chemical safety is vital when preparing new water, so let's explore your best options.
Here are four proven methods to guarantee your water is safe for your finned friends:
- Chemical dechlorinators work instantly and are perfect when you're in a hurry – just follow the dosage instructions carefully to keep your fish safe.
- Natural aeration by letting water sit for 24-48 hours is chemical-free but requires planning ahead.
- Boiling water for 15-20 minutes quickly removes chlorine, though you'll need to let it cool completely.
- UV light treatment offers precise control but requires special equipment.
You'll find that chemical dechlorinators are the most popular choice among aquarists because they're quick and reliable. Additionally, ensuring optimal water quality contributes to the overall health and lifespan of your fish.
However, if you prefer a more natural approach, the aeration method works wonderfully – just remember to plan your water changes ahead of time.
Whatever method you choose, consistent dechlorination is key to your fish's health and happiness.
Post-Change Tank Monitoring
Once you've completed your water change, keeping tabs on your aquarium's conditions becomes essential for maintaining a healthy environment.
You'll want to wait at least 24 hours before water testing, as this gives parameters time to stabilize. During this period, keep an eye on your fish behavior – if they're acting oddly, it might signal that something's not quite right with the water chemistry.
Make sure you're monitoring the temperature closely, as sudden changes can stress your finned friends. The new water should match your tank's temperature perfectly – think of it like making sure your shower isn't too hot or cold!
Don't forget to use a reliable dechlorinator that tackles both chlorine and chloramines to keep your fish safe and happy. Additionally, remember that maintaining optimal pH levels is crucial for the health of your aquatic life.
Regular maintenance is your best friend when it comes to tank care. Aim for weekly water changes of about 25%, and stick to a consistent testing schedule.
Think of it as giving your underwater world a regular health check-up! By maintaining this routine and carefully monitoring your tank post-change, you'll create a stable, thriving environment for your aquatic pets.
Common Water Change Mistakes
While monitoring your tank helps prevent problems, knowing what not to do is equally important.
You'll want to avoid some common mistakes that can stress or harm your fish. Let's look at the most vital errors aquarists make during water changes and how you can prevent them.
Here are the top mistakes you'll want to avoid:
- Overchanging water – Don't remove more than 25% at once, as this can shock your fish and disrupt the tank's delicate balance.
- Using untreated tap water – Always use a dechlorinator before adding new water, as chlorine can be lethal to fish.
- Ignoring temperatures – Match the new water temperature to your tank's to prevent thermal shock.
- Excessive substrate siphoning – Don't clean more than 50% of the gravel at once to preserve beneficial bacteria.
Regularly testing your water parameters, including ammonia levels, is crucial for maintaining a stable aquatic environment.
Remember to test your water parameters regularly – it's surprising how many people skip this essential step!
Think of your aquarium as a tiny ecosystem where every change matters. By avoiding these mistakes and being mindful of your tank's needs, you'll maintain a healthy environment where your fish can thrive.
Frequently Asked Questions
Can I Use Bottled Spring Water for My Aquarium Water Changes?
You can use bottled spring water, but it's not ideal. While it offers benefits like natural minerals, you'll face drawbacks including inconsistent quality, high costs, and potential contaminants. Consider treated tap water instead.
How Long Should I Wait Between Water Changes if Fish Are Breeding?
You'll need weekly 10-15% changes to maintain tank stability during breeding behavior. If you're keeping fry, increase to twice-weekly 25% changes. Always monitor water quality and adjust based on your tank's needs.
Should I Feed My Fish Before or After a Water Change?
You'll want to feed your fish before the water change, as this feeding schedule helps remove uneaten food during maintenance. However, if your fish show signs of stress, wait until after they've settled down.
What if My Tap Water Naturally Has Different Ph Than Tank Water?
You'll need to adjust your tap water pH before adding it to your tank. Use water conditioners and pH adjustment techniques like peat moss filtration or mixing with distilled water to match your tank's levels.
Can Water Changes Help Treat White Spot Disease in Fish?
Yes, you'll find regular water changes effective against white spot disease. They improve water quality by removing parasites and toxins while disrupting the parasite's life cycle, making treatments more successful for disease prevention.
Final Thoughts
You're now equipped with all the knowledge needed to change your fish tank water like a pro! Remember, it's not just about scooping and dumping – your finned friends depend on you to maintain their watery world carefully. By following these steps and avoiding common mistakes, you'll keep your aquatic pals happy and healthy. Don't rush the process, stay consistent with your water changes, and you'll have a thriving underwater community for years to come.